How To Make Videos With Great Audio | Part 2
In part two of this three-part series (recorded in December 2017**), I walk you through audio workflows for video in Adobe Audition. From using the Auto-Gate and Compressor functions in the re-imagined Dynamics effect to using the new Auto-Ducking feature, now part of Audition's Essential Sound Panel. You'll also get some tips for splitting stereo clips into mono stems, converting sample rate/bit rate and channel configurations, fixing digitally clipped audio, time stretching clips as well as Audition's unique REMIX feature, that automatically, dynamically recomposes any music track to any desired length...and 'essentially' does all the editing for you! Find timestamped chapters below.
---
Skip ahead to any section with CHAPTERS:
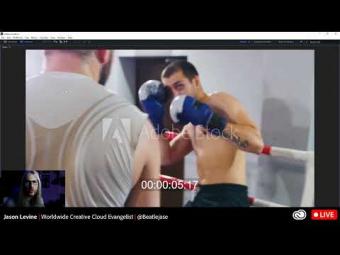
01:01 Audition’s new Timecode options/preferences
05:28 The re-imagined DYNAMICS effect for noise gating
07:14 Understanding the settings in the Auto-Gate section of the Dynamics effect
11:06 Fine-tuning unwanted noises on the clip via the non-destructive fade handles
13:13 Explaining settings in the Compressor section of the Dynamics effect
18:21 Tagging dialogue & music in the Essential Sound Panel, preparing to use Auto-Duck
19:15 Understanding the benefits of using Loudness Auto-Match in Essential Sound
20:12 Explaining the settings of the Ducking feature and dynamic auto-adjustment
24:11 Previewing the auto-ducking results
26:11 Making manual adjustments to the ducking curve via disabling ‘Monitor Clip Changes’
27:37 Splitting stereo audio files into 2 mono clips (via Extract Channels to Mono Files)
30:37 Convert Sample Type (in Audition) for any kind of sample rate/bit rate/channel conversions
33:51 Global Clip Time Stretching and REMIX functions (overview)
36:11 Enabling the Remix function via Essential Sound Panel
39:39 Modifying additional Remix options/parameters (power user settings)
43:10 Manually remixing the cross-faded segments (split into segments)
46:50 Tools for Audio Analysis (Amplitude Statistics)
51:52 Fixing digitally clipped samples with the DeClipper (via the Diagnostics Panel)
56:51 Sending the session back to Premiere Pro (fixed) and your options for doing so
**As this was recorded in December 2017 using the CC 2018 versions of the software, there are several things not yet present (like Auto-Ducking in Premiere Pro, which was introduced this past April). Stay tuned for an update video pertaining to 'new' Audio additions in the CC 2019 versions.



YORUMLAR