How to Make Great Videos: Color (Part 2) | Input LUTs, Flat Footage & HSL Secondaries
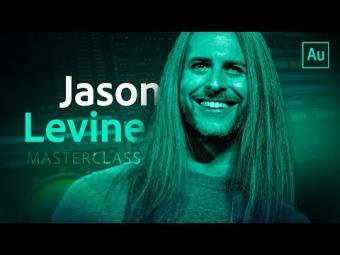
In part two of this three-part series, Principal Evangelist Jason Levine focuses on grading flat footage (and shows some tips of how to acquire hidden LUTs inside of Premiere Pro); you'll get to see several examples of different creative looks on the same content, and this is followed by showing you how to use secondary color correction to target specific pixel/color ranges, and correct/modify the color of objects, skin tones or even replacing a sky/background. Find timestamped chapters below. Learn more about this tutorial series: https://theblog.adobe.com/live-stream-series-make-good-videos-great-color/ Find more videos in this series: https://www.youtube.com/playlist?list=PLD8AMy73ZVxWiBMQM6zZ0fQHCXOZ2f1m9 Download free trials and the latest features in Adobe Creative Cloud video and audio tools: https://adobe.ly/2oqUM0w
---
00:29 Brief review of previous episode topics (Basic corrections panel, Creative, Curves & Vignette)
01:49 Reviewing original 7D footage with color baked in (not flat)
05:34 Using an Input LUT to flatten your footage, after the fact
08:47 Locating ‘hidden’ Legacy Camera LUTs from within the Package Contents of the application
12:56 Shooting advice: get your exposure correct during capture
14:37 Using an Adjustment Layer to apply the look/grade to footage
16:52 Showing different ‘look’ variations from the same session
17:41 Secondary Color Correction (object) using the HSL Secondary panel in Lumetri
22:44 Using Copy/Paste Attributes to apply secondary color corrections across multiple clips
24:42 Using HSL Secondaries to correct skin tone
30:04 Using HSL Secondaries for sky replacement
36:15 Some side-by-side ‘before and after’ examples of flat vs. graded footage
---
Subscribe: https://www.youtube.com/user/adobecreativecloud?sub_confirmation=1
LET’S CONNECT
Facebook: http://facebook.com/adobecreativecloud
Twitter: http://twitter.com/creativecloud
Instagram: http://www.instagram.com/adobecreativecloud/
Adobe Creative Cloud gives you the world's best creative apps so you can turn your brightest ideas into your greatest work across your desktop and mobile devices.
---
00:29 Brief review of previous episode topics (Basic corrections panel, Creative, Curves & Vignette)
01:49 Reviewing original 7D footage with color baked in (not flat)
05:34 Using an Input LUT to flatten your footage, after the fact
08:47 Locating ‘hidden’ Legacy Camera LUTs from within the Package Contents of the application
12:56 Shooting advice: get your exposure correct during capture
14:37 Using an Adjustment Layer to apply the look/grade to footage
16:52 Showing different ‘look’ variations from the same session
17:41 Secondary Color Correction (object) using the HSL Secondary panel in Lumetri
22:44 Using Copy/Paste Attributes to apply secondary color corrections across multiple clips
24:42 Using HSL Secondaries to correct skin tone
30:04 Using HSL Secondaries for sky replacement
36:15 Some side-by-side ‘before and after’ examples of flat vs. graded footage
---
Subscribe: https://www.youtube.com/user/adobecreativecloud?sub_confirmation=1
LET’S CONNECT
Facebook: http://facebook.com/adobecreativecloud
Twitter: http://twitter.com/creativecloud
Instagram: http://www.instagram.com/adobecreativecloud/
Adobe Creative Cloud gives you the world's best creative apps so you can turn your brightest ideas into your greatest work across your desktop and mobile devices.








YORUMLAR