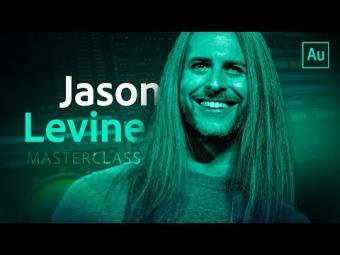
How to Make Good Videos Great with Audio (Part 3) | Sound Design, Surround & Finishing
In the third and final episode of this series, Principal Evangelist Jason Levine focuses on sound design techniques, mixing automation and delivery final masters that broadcast loudness compliant. Learn in detail how to use and refine Audition's time-stretch tools (in real time, in the multitrack, leverage modulation and delay effects to create depth, dimension and drama with your sound effects, automate basic operations and granular parameters from any native or VST effect, automate position in 5.1 surround finally some tips for monitoring, analyzing and delivery audio that conforms to both ITU and EBU broadcast standards. Find timestamped chapters below. Learn more about this tutorial series: https://tinyurl.com/y8k3jcjm Find more videos in this series: https://www.youtube.com/playlist?list=PLD8AMy73ZVxWiBMQM6zZ0fQHCXOZ2f1m9 Download free trials and the latest features in Adobe Creative Cloud video and audio tools: https://adobe.ly/2oqUM0w
---
Skip ahead to any section with CHAPTERS:
01:59 Sending the sequence directly from Premiere Pro to Audition (Edit Sequence in Audition)
06:58 Adjusting track height with gestures, manually
07:58 Creating an ‘ascending’ string part with copy/paste, then Effects-Stretch & Pitch
10:28 Time-stretching a clip (adjusting duration and/or pitch or both) in the multitrack, non-destructively
12:05 Properties panel stretching options (and the different modes and types)
23:18 Adding modulation effects (Phaser)
26:15 Adding Analog Delay with feedback+trash to add depth and accentuate the crescendo
30:09 Creating the infinite delay/feedback loop effect
35:42 Enabling control surface support with Mackie HUI mode
37:44 Automation Modes & fader automation with the Faderport (or any Mackie HUI compatible) controller
40:45 Revealing the automation lanes & keyframes in Audition’s multitrack
41:43 Automation/Keyframe settings (auto-match time, edit point thinning)
49:01 Automating individual effects parameters (reverb)
55:38 Automation mode similarities in Premiere Pro
57:05 Automating tracks in 5.1 surround in Premiere Pro
58:30 Editing and automating the surround sequence in Audition
59:03 The surround track panner
1:03:02 Adding a multi band compressor on the master fader
1:05:22 Loudness Radar Meter for live-monitoring broadcast loudness (LUFS)
1:09:03 Export stems or mono/stereo/5.1 mix to Premiere Pro and other options
1:10:30 Creating the Mixdown of the session before sending to Premiere Pro
1:12:22 Using Amplitude Statistics on the final mix, checking peak amplitude, loudness level and looking for any issues
1:14:23 Insuring Broadcast-Safe audio with the Match Loudness Panel
1:18:19 Wrap-up about what we’ve discussed in this lesson
--
Subscribe: https://www.youtube.com/user/adobecreativecloud?sub_confirmation=1
LET’S CONNECT
Facebook: http://facebook.com/adobecreativecloud
Twitter: http://twitter.com/creativecloud
Instagram: http://www.instagram.com/adobecreativecloud/
Adobe Creative Cloud gives you the world's best creative apps so you can turn your brightest ideas into your greatest work across your desktop and mobile devices.


YORUMLAR