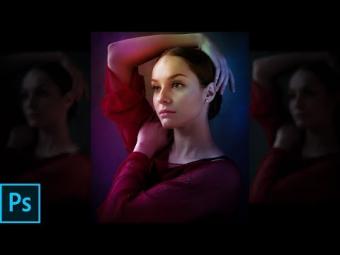
How to Enhance Bokeh Blur Background in Photoshop - Add Smooth Blurred Effect to Photos Easily
In this photoshop photography editing tutorial, i will show you how to enhance bokeh blur backgrounds in your photos and make the distinct area out of focus very smoothly. ►Download PSD file: http://photoshopdesire.com/enhance-bokeh-blur-background-photoshop/ ►Download Photo to Practice: https://www.flickr.com/photos/psdesire/39009282585
Open the image you want to blur the background in Photoshop.
First we will boost the existing bokeh using levels adjustment. Add levels, adjust middle grey handle little to darken the midtones and drag white handle towards left to lighten the highlights. Rename the layer to "BOOST BOKEH"
Now let's add some matte look to bokeh to tone down highlights little bit using curves.
Add a curves adjustment layer, add 3 control points on whiter side of your point curve. Depending on your particular photo you may want to lower the right end little more or less, As you do this, the ‘matte’ look begins to appear.
Now change the layer blending to "LUMINOSITY". Rename the layer to "Matte Bokeh Highlights".
Now pop the colors of the bokeh using vibrance adjustment. Add a vibrance adjustment layer, adjust vibrance slider to your preference.
Rename the layer to "Vibrant bokeh".
Now Create a new layer from all the visible layers by pressing Ctrl + Shift + Alt + E. Rename the layer to "Add smooth blur".
Then go to filter menu - blur - apply lens blur. In this case, keep blur radius to 70, brightness: 4, threshold : 251. and noise distribution: gaussian. Click ok to apply the changes.
Now group all the layers and name it "Enhance bokeh". Add layer mask to the group. and lower the opacity to your preference to keep the background bokeh natural and integrate with the original.
Now take lasso tool and make a rough selection around the subject.
Then go to image tab - use apply image on a layer mask to make the effect applied only to lighter parts of the subject. keep all settings to default. click ok.
Now go to mask properties, feather the mask to soften the edges of the selection, it allows to blend the blur effect with background.
Now take a soft edge brush and select foreground color to black. Paint inside the subject to hide the blurring effect and keep it original.
Final step, it is optional, if you want more blur increase the opacity. In this case i prefer to keep it at 65% which looks natural.
That’s it! We're Done. How to Blur Photo Background Like Costly Expensive Lens Photography. Shallow Depth of Field Effect Using Lens Blur.
Blur Background Fantasy Photo Effect Editing. How to create Bokeh background blur easily.
Fantasy Photo Effects & Blur Background. How to Achieve Blurred Backgrounds in Portraits.
How to Take a Photo with a Blurred Background. How to get a blurred background from your DSLR's kit lens. Basic DSLR photography tips.
►Check out all tutorial here : https://www.youtube.com/photoshopdesiretv/videos
Thanks for watching our free Tutorials! If you enjoyed our video be sure to subscribe to our channel to receive free new videos.
►SUBSCRIBE: https://goo.gl/d31fld
Don't forget to COMMENT, LIKE and SHARE, to get more :)
Follow US - LET'S BE FRIENDS!
------------------------------------------
►Official Website: http://www.photoshopdesire.com
►FACEBOOK : http://www.facebook.com/photoshopdesire
►GOOGLE+ : https://plus.google.com/+photoshopdesiretv
►Twitter : https://twitter.com/PSDesire
►Instagram: https://www.instagram.com/photoshopdesire
Softwares Used:
----------------------------
Photoshop cc 2014, 2015, 2017
Photoshop cs5, cs6,
After Effects cs5
Camtasia Studio
Music:
------------
Let's Do It (YouTube Library)
Check Out Our Playlists:
--------------------------------------
Photoshop Tutorials for Beginners, Intermediate and Advanced users
https://www.youtube.com/playlist?list=PLGLEKqTDn233O6PusOR1lEvRwjlErdCYV
Easy, Quick and Fast Photoshop Tutorial Series (NEW)
https://www.youtube.com/playlist?list=PLGLEKqTDn230TS2NzqA2BGblNYZ4NpGWT
HDR Photography Using Photoshop
https://www.youtube.com/playlist?list=PLGLEKqTDn232tlbcBJHNiEPj1h0wPJvVG
Photo Editing, Photo Effects & Photo Manipulation - Special FX
https://www.youtube.com/playlist?list=PLGLEKqTDn233VC9ZDSiLav8bI8FKJ93ny
Adobe Camera Raw Filter Tutorials and Preset downloads
(same settings steps for lightroom also)
https://www.youtube.com/playlist?list=PLGLEKqTDn233ab_cdALEjtjGASqtTie10
Color Grading or Coloring in Photoshop
https://www.youtube.com/playlist?list=PLGLEKqTDn233uKTZWUFq7GwgNB6BJyM7m
Skin, Face & Body Retouching Techniques and Enhancing Tips
https://www.youtube.com/playlist?list=PLGLEKqTDn232WN_N6Ek-vnfzr7nNKDHWT
Free Photoshop Actions for Photographers and Designers
https://www.youtube.com/playlist?list=PLGLEKqTDn233ZVGBJWihIuxGrav7VTCCD








YORUMLAR