Adjustment Brush in Lightroom - The Key to Professional Look | Lightroom Tutorials #10
Learn how to use Adjustment Brushes in Lightroom. Adjustment Brushes will enable you to retouch specific areas locally. Using Lightroom brushes will separate you from a beginner to be a professional. If you want to give special attention to a particular object or subject, adjustment brushes is up for the help.
For complete series of Lightroom Tutorials for Beginners, here's our playlist: https://goo.gl/tiKLB8
If you enjoyed the content, do consider subscribing: https://goo.gl/94umrc
There are two types of adjustments in Lightroom: Global Adjustments and Local Adjustments. Global Adjustments are the adjustments that you make throughout the image. These are basically the sliders which affect whole of the image and you don't specify which area you want the slider to control. For example, Sliders in the Basic Panel of the develop module like White Balance, Exposure, Contrast, Highlights, Shadows etc. On the other hand Local adjustments are the adjustments that you make to a specific area of the image that you decide. This can and is used in a variety of settings.
Suppose you have clicked a picture of a landscape and you want the sky to be a little bit darker and the sea to be a little bit brighter and the sand to have more clarity. How do you do that? Using adjustment brushes. With Adjustment Brushes you paint those certain areas and apply the adjustments accordingly for the area that you have painted. Lightroom provides a lot of controls for the area painted by the brush like White Balance, Exposure, Contrast, Highlights, Shadows, Clarity, Saturation etc.
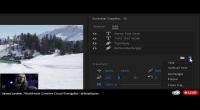
In this video we will learn how to use Adjustment Brushes with several examples to make it easy for you to understand. I'll also try to cover most of the common questions while using adjustment brushes like How to zoom out while using the adjustment brush or having the adjustment brush selected? Also, a common problem that many of us turn into is that the effect we apply to the brushes is sometimes too much. We understand it is a human nature to overdo things but how do we overcome that? One method is bringing all the sliders to the centre but that is very tedious and not accurate. A ignored way or an amazing hack is to use the small neglected down arrow key next to the white balance adjustment when the brush is selected. Click that arrow and the "Amount" slider turns up. Turning up or down the slider will increase or reduce the overall effect of the brush. Also most of the times, it gets confusing to change the adjustment brushes. We'll also cover that by using a new brush for each effect as shown in the video. Deleting an adjustment brush is also very simple. select the anchor point of the brush and hit the delete key, that it!
basically, the Adjustment Brush acts like a mask for a specific effect. Using Adjustment Brushes gives your image the professional look it deserves. Certain adjustments like clarity must be applied with adjustment brushes selectively to prevent the halo effect.









YORUMLAR